By Lee Sykes
January & February 2006
This video tutorial outlines the various techniques available for using skins and containers in DotNetNuke, from implementing site-wide portal skins to just single pages and modules.
A skin can be applied at host, portal, page or module level.
There are two methods for applying a skin to a DotNetNuke® portal:
- Using the Skins Manager
(Admin menu / Skins) or (Host menu / Skins)
(The tick boxes determine how the skin will be applied)
- The manager allows you to preview / apply & delete skins
- Using Host menu / Host settings and Admin menu / Site settings
The video tutorial below explains how to apply skins using method 2.
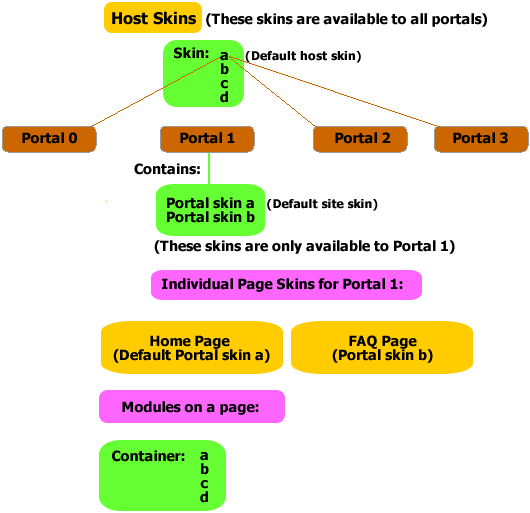
Skin format / inheritance / structure
If you set a skin in the Host menu / Host Settings, this skin will be applied as the default skin for all of your portals within your current DotNetNuke installation.
If you set a skin in the Admin menu / Site Settings for an individual portal, this will override the default skin in the Host menu / Host Settings.
For each page within your portal you can set a different skin using the Page Settings.
For each module within a page you can specify a container to surround the module using the Module Settings.
View figure 1 below.
The video below demonstrates all of these possibilities and explains how the skins are applied throughout the portals, pages and modules.
Time Length: 16 min 9secs

Figure 1.