By Ruben Gatt
February 2010
This tutorial demonstrates how to implement Multi-Language functionality using the DotNetMushroom RAD Module.
This article is a continuation of the
How to Style the News Application Built with DotNetMushroom RAD article. We will be adding Multi-Language features to the News Application via the RAD Module.
Introduction
Before attempting this tutorial it is recommended to follow the first two tutorials,
How to Build a News Application with DotNetMushroom RAD and
How to Style the News Application Built with DotNetMushroom RAD if you are not already familiar with the features and functionality of the RAD Module.
This article will continue over the work completed in the previous article so it will be useful to install the application from
How to Style the News Application Built with DotNetMushroom RAD to make it easier to follow the steps in this tutorial.
Set-up Multi-Language in DotNetNuke 4.x
In order to use the Multi-Language feature of the DotNetMushroom RAD Module, the Languages’ Locales need to be added from the DotNetNuke Host Menu under the Languages section.
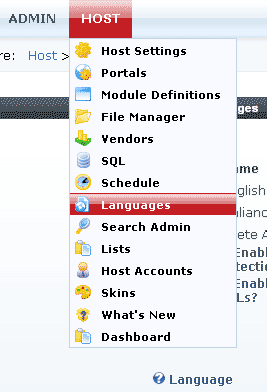
Screenshot of the Languages section which is found under the DotNetNuke Host menu.
After the Languages section of DotNetNuke loads, there should be at least one language that is the default language of the DotNetNuke CMS. To add another language to the website click on the Language dropdown > Select the Language desired > Click the Add button.
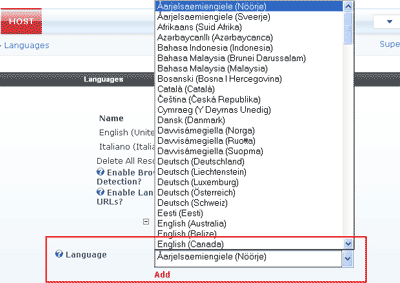
Screenshot of the Languages section.
After adding a new Language Locale it should be listed in the Supported Locales list.
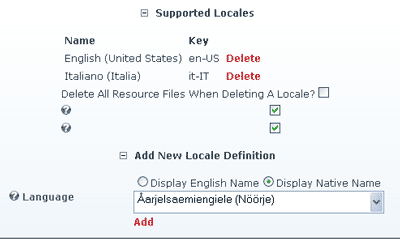
Screenshot of the Supported Locales List.
Set-up Multi-Language in DotNetNuke 5.x
In order to use the Multi-Language feature of the DotNetMushroom RAD Module the Languages’ Locales need to be added from the DotNetNuke Admin Menu under the Languages section.
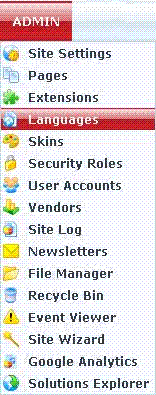
Screenshot of the Languages section which is found under the DotNetNuke Host menu.
After the Languages section of DotNetNuke loads you need to add a language to the website. Scroll down and click on ‘Add New Language’.

Screenshot of Add New Language.
The ‘Add New Language’ screen will load, select the language from the first dropdown and select the fallback language from the second dropdown.
Note: The Fallback language is the default language to be used if Dotnetnuke does not find the necessary resources in the current language.
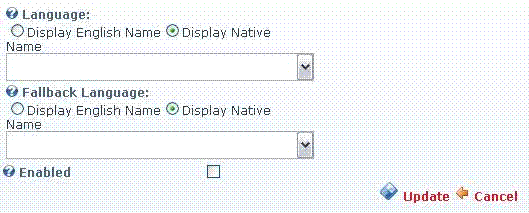
Screenshot of the Add New Language Screen.
After adding a new Language Locale it should be listed in the Available Locales list.

Screenshot of the Available Locales List.
Set-up Multi-Language Flags in DotNetNuke
Now that there is more than one language available to be used with DotNetNuke, either a dropdown menu or the country flags should display at the top of the page (In the default Minimal Extropy Skin).

Screenshot Flags at the top of the page.
If no flags or menus are visible make sure that the .ascx skin file contains the following code:
<dnn:LANGUAGE runat="server" ID="dnnLANGUAGE" ShowMenu="false" ShowLinks="true" />
The above code displays a list of all the languages the user can choose in order to view the website. Now that the languages are set in DotNetNuke we can start the process in the DotNetMushroom RAD Module.
Step 1: Preparing the News Application Tables for Multi-Language
Now that there is more than one language available to be used with DotNetNuke, either a dropdown menu or the country flags should display at the top of the page (In the default Minimal Extropy Skin).

Screenshot Flags at the top of the page.
If no flags or menus are visible make sure that the .ascx skin file contains the following code:
<dnn:LANGUAGE runat="server" ID="dnnLANGUAGE" ShowMenu="false" ShowLinks="true" />
The above code displays a list of all the languages the user can choose in order to view the website. Now that the languages are set in DotNetNuke we can start the process in the DotNetMushroom RAD Module.
Step 1: Preparing the News Application Tables for Multi-Language
If you
downloaded and unpackaged the News application from the previous tutorial you should have one table in the Tables section in the Control Panel.
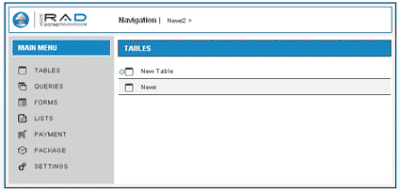
Screenshot of the tables found in the Tables section of the RAD Module.
Click on the table name and a form should load with the list of the fields found in the table. There should be only two fields present in the table which are the “Date” and the “NewsText” field.
In order to use the Multi-Language features implemented in the DotNetMushroom RAD Module a new field has to be added. This field will store the locale of the language, so when a user clicks on the flags to select the language, the RAD Module loads the data from the database that is associated with the chosen language.
The field name of the new field is set to “Language”, the field type is set to “Text” since the data that will be saved in this field will be of type text and the field caption is set to “Text Language”.
The screenshot below shows the details entered for the new field.
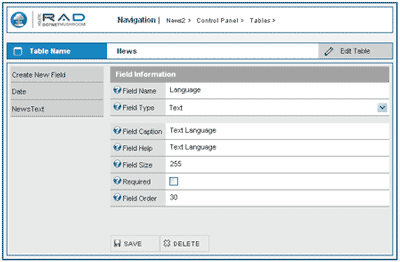
Screenshot of the details entered for the new Language field.
Step 2: Modifying the NewsEdit Form in the News Application
2.1
The next step is to add a dropdown to the NewsEdit form under the Forms section of the News application which will save the locale of the language selected during the edit of the news item.
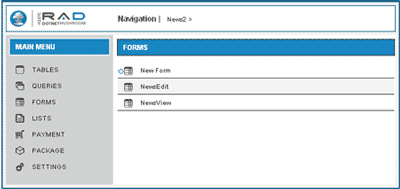
Screenshot of the forms list in the Forms section of the DotNetMushroom RAD Module.
Go into the Forms section and click on NewsEdit to edit the NewsEdit form.
The next step is to click on the Templates Tab.

Screenshot of the Templates Tab button.
As soon as the page loads the body template of the NewsEdit form is loaded. There are already some controls which were created in the
previous tutorial.
In order to add the dropdown we need to add a new control of type DNMDROPDOWN (as shown in the screenshot below).
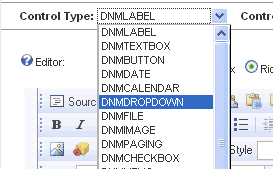
Screenshot of the Control Type dropdown list.
After adding the dropdown and after placing it correctly in the HTML template press the save button to save the Body Template in the database.
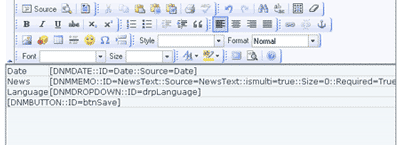
The code in the editor should look similar to the above screenshot.
2.2
After the template is saved click on the Properties Tab.

Screenshot of the Properties Tab button.
Now click on the dropdown name from the list of control names on the left side of the DotNetMushroom RAD Module.

Screenshot of the dropdown control name in the control list
Now the control settings should load on the right hand side of the Module.
Set the Drop Down Type to “Locale” and set the Data Source to “Language”. The Drop Down Type will fill the dropdown list with all the Languages available for the website and the Data Source will tell the Module in which field to store the value of the selected option from the dropdown.

Screenshot of the settings of the dropdown control.
Finally press the Save button to save the settings of the dropdown. Make sure that the settings have been saved properly.
Step 3: Modifying the NewsView Form in the News Application
Now that the NewsEdit form is set and ready, the next stage is to modify the settings of the NewsView form so that the form knows which field is used to store the language of the data saved in the database.
3.1
Click on the NewsView form under the Forms section of the DotNetMushroom RAD Module.
Scroll to the bottom of the form settings to the Form Multi Language section.
The Multi Language checkbox needs to be ticked in order to tell the form that the Multi-Language features will be used.
In the Multi Language Field one needs to write the exact name of the field created earlier in the News table. This will tell the form which field is being used to store the language of the data in the database.

Screenshot of the details in the Multi Language settings of the form.
Finally click the Save button to save the settings of the form and make sure that the settings saved properly.
Step 4: Adding a News Item
Now that all the forms are set-up, the news items can be added into the News application.
In order to add a new news item, navigate to where the news form is placed and click on the Add New button.

Screenshot of the Add New button in the News Application.
Once the form has loaded, you should note that we now have an extra control from where to choose the language of the news item that is going to be saved.

Screenshot of some sample data inputted in the new news item form.
As shown in the screenshot above some sample data was inputted in the fields of the form and the language chosen is English (United States). Enter the desired data in the new news item form, make sure to select the language from the dropdown list and press the Save button.
The new news item in the English language was created. Now do the same thing, but save the news item in another language rather than English (United States).

Screenshot of the list of news items in English Language.
Step 5: Viewing the News Items According to the Language Assigned
After repeating the steps to create another news item and save it in another language, note that the new news item is not shown with the English (United States) news items since the NewsView form filters the news items according to the language saved in the Language field.

Screenshot of the English news items.

Screenshot of the Italian news items.
To view the other language’s news item either click on the language flag at the top or else select the language from the dropdown list if it is displayed instead of the language flags. It’s good to note that even the date and time change according to Language Locale selected.

Screenshot of the flags at the top of the page.
In order to add more languages, add more Language Locales in the DotNetNuke Languages section found in the Host menu under Languages, and the dropdown of the Languages in the form will automatically load all the Languages added.
Step 6: Editing the News Items According to the Language
As already noted above, the NewsView form loads the data according to the Language selected, therefore in order to edit the English Language news item, make sure that the language selected is currently the English Language.
The same applies for the other languages; if you need to edit the news item in Italian, the Language selected needs to be the Italian Language since the NewsView form will load only the news items in the selected language.
After the desired language is selected, click on the Edit button to edit the news item.

Screenshot showing the Edit button.
Step 7: Changing a News Item’s Language
In order to assign a different language to a news item; first make sure that the correct Language is selected and then click on the Edit button next to the news item that you wish to change.

Screenshot showing the NewsEdit form while editing the data.
Now click on the Language dropdown and select the desired Language from the dropdown list.

Screenshot showing the Language dropdown list.
After selecting the desired Language press the Save button to save the news item.
Once the page has loaded in the Italian Language, no news item will display because we changed the news item Language to English. In order to view the news items, change the Language back to English, or to the default language of the website.

Screenshot of the English Language news items.
As shown in the screenshot above all the news items are now saved under the English Language and therefore will only show when the English Language is selected.
Comments